Here is what a Jug Scope inspection gives you: a complete, analyst-ready record of every cylinder in your engine — the same eleven views, in the same order, every time. No guesswork about what to shoot. No missed angles you discover only after the cowling is back on. No reshoots. When you hand the finished set to your A&P or send it out for expert analysis, it is already in the form an engine analyst (and the automated screening they rely on) expects, so they can get straight to the answer that matters: how is this engine actually doing inside?
That consistency is the whole point. The app walks you through the standardized protocol so you do not have to carry it in your head, and so the result looks the same whether it is your first inspection or your fortieth.
For owners — This is peace of mind you can hold. A complete set caught early can flag a burning valve or barrel wear long before it becomes an expensive surprise — and it gives you a credible, organized record to put in front of your mechanic or an engine analyst instead of a phone full of loose, unlabeled photos.
For shops — This is consistency you can sell. Every tech produces the same complete set in the same order, so your deliverable looks professional no matter who held the probe — and you can hand the customer a clean, labeled record that shows exactly what you found and that you did the job right.
This section covers the whole capture flow, start to finish. Before you start, make sure your borescope is connected and you have a live picture on screen — that is covered in §3, Hardware Setup.
During beta: Capture is completely open — you can run a full inspection and review every image without a subscription. Paywall enforcement is turned off for the beta.
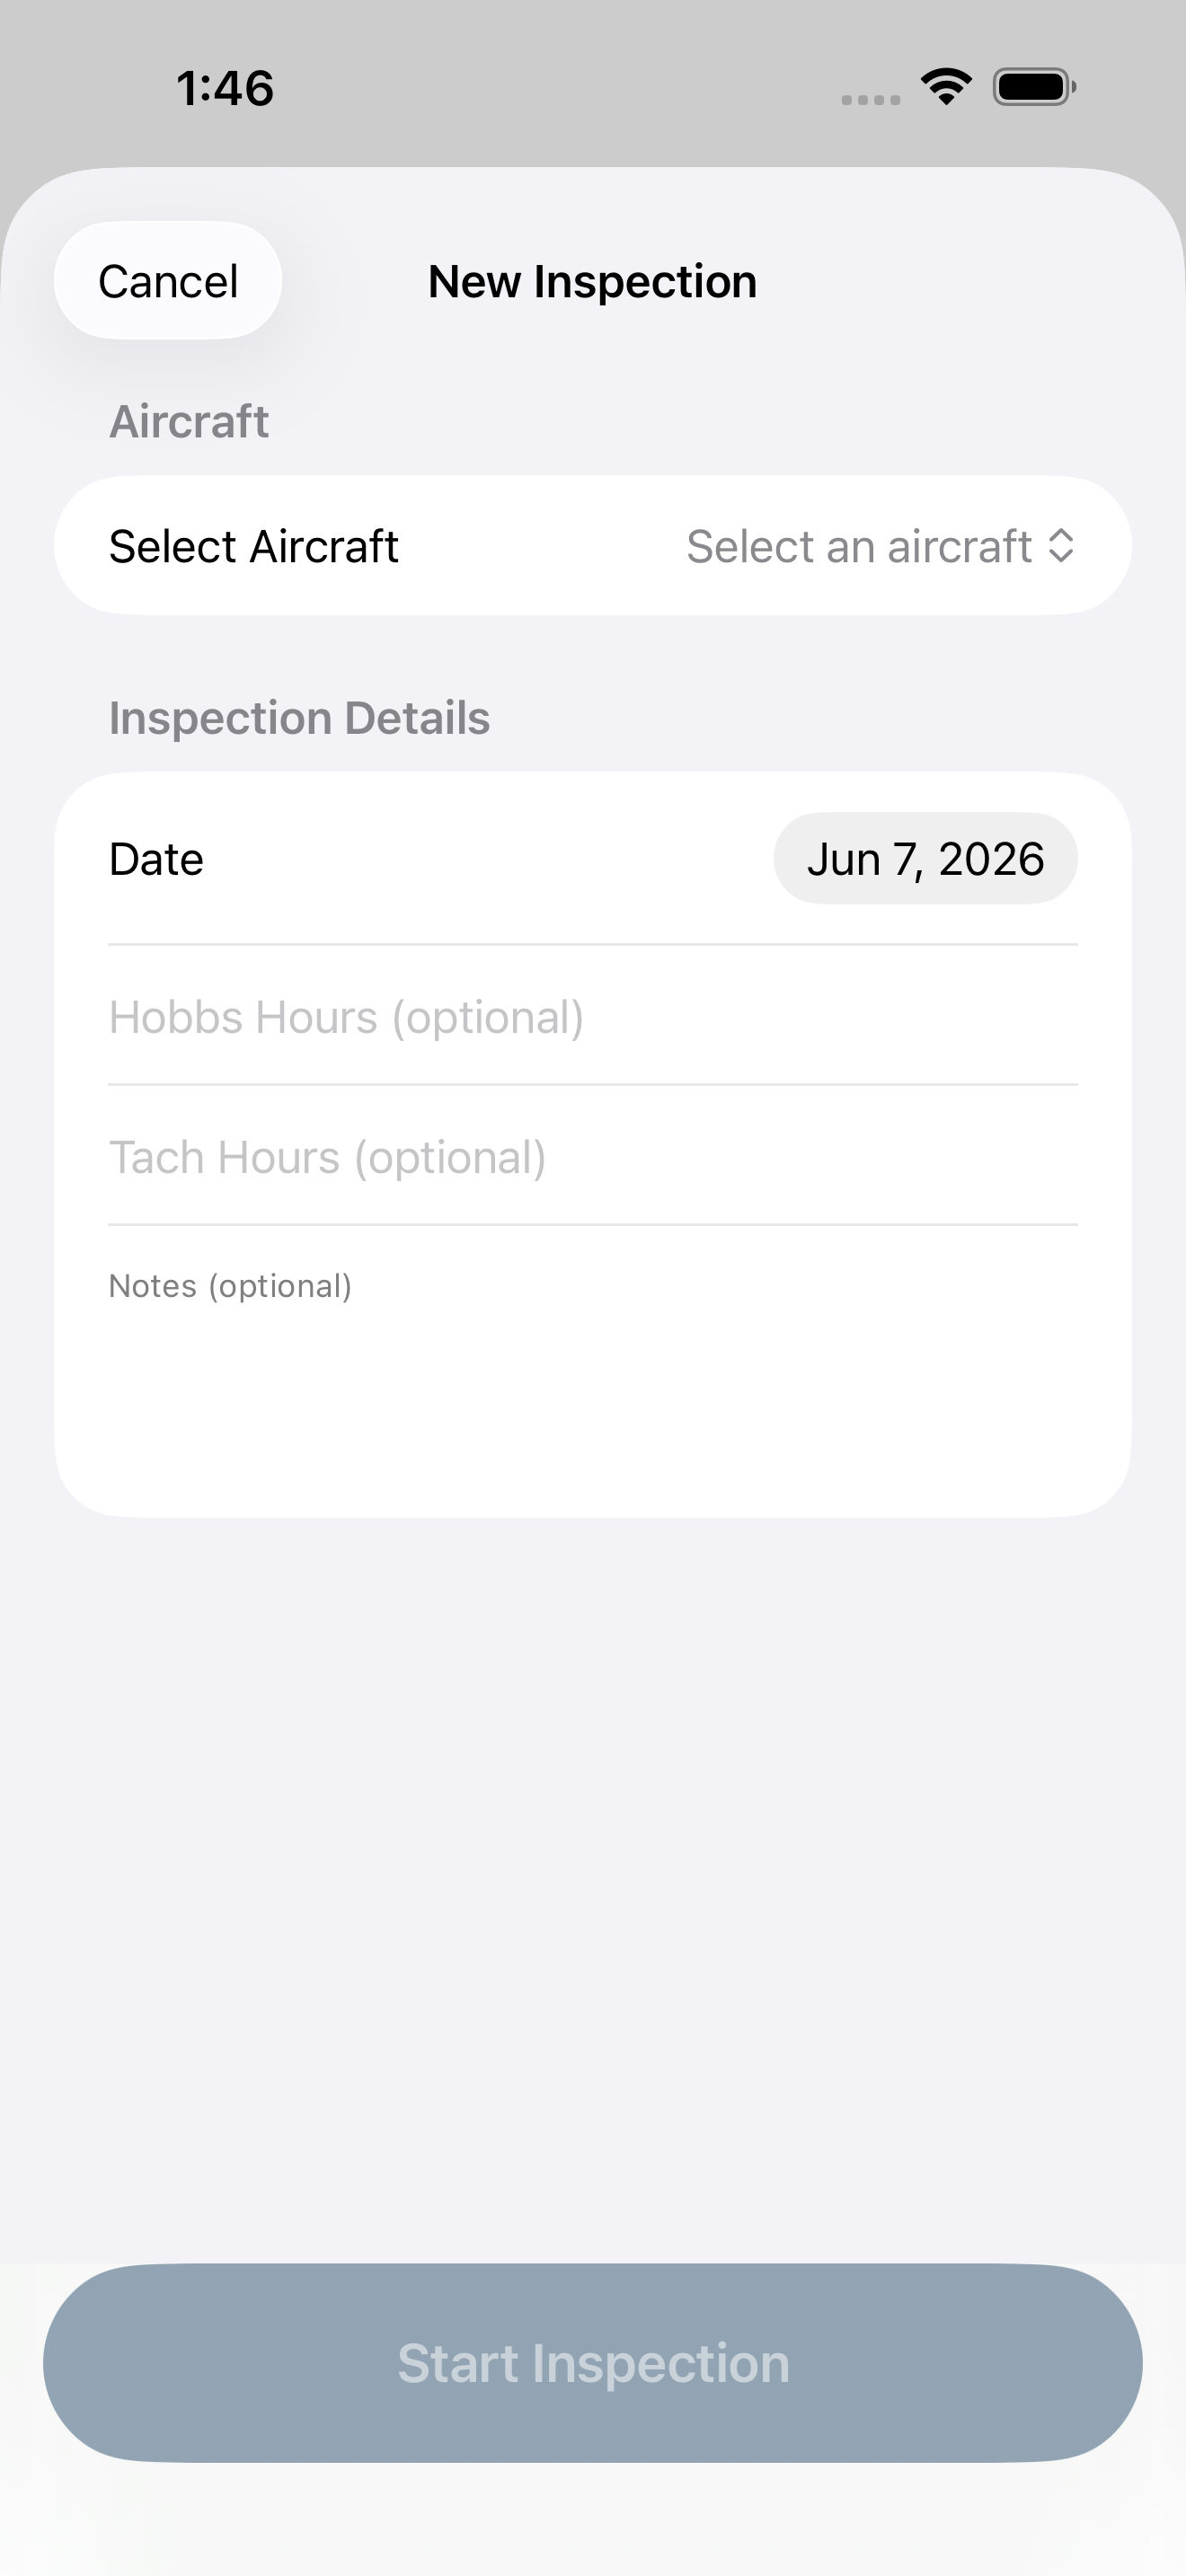
4.1 Start a new inspection
A good inspection starts with a record that describes itself. The few details you set up front — which aircraft, when, and at what engine time — are what turn a folder of images into something you, your mechanic, or your next inspection can actually make sense of months from now.
From the Home screen, tap Start New Inspection. The New Inspection sheet appears.
- Choose the aircraft. If you have one aircraft on file, it is selected automatically and shown with its make, model, engine, and cylinder count. With more than one, pick the tail from the Select Aircraft menu.
- Set the date. Defaults to today. Change it if you are logging an inspection you performed earlier.
- Add Hobbs and Tach hours (optional, but worth it). Recording engine time here stamps every image with a point of reference — it is what makes a year-over-year comparison mean something instead of just being two sets of pictures. We recommend filling these in every time.
- Add notes (optional). A free-text field for anything worth remembering — a squawk you are chasing, oil consumption, the reason for the inspection.
- Tap Start Inspection.
The cylinder count comes from the aircraft itself (typically four or six on a piston GA engine), so the inspection is sized correctly the moment it opens — you never have to tell the app how many cylinders to expect.
For owners — Those Hobbs/Tach hours are what make the comparison feature pay off later. Log them every time and a pile of photos quietly becomes a real trend you can watch. See §5, Reviewing & Comparing.
For shops — Capture the customer's reported hours here and the inspection record speaks for itself when you hand it back — no separate paperwork explaining what they were looking at.
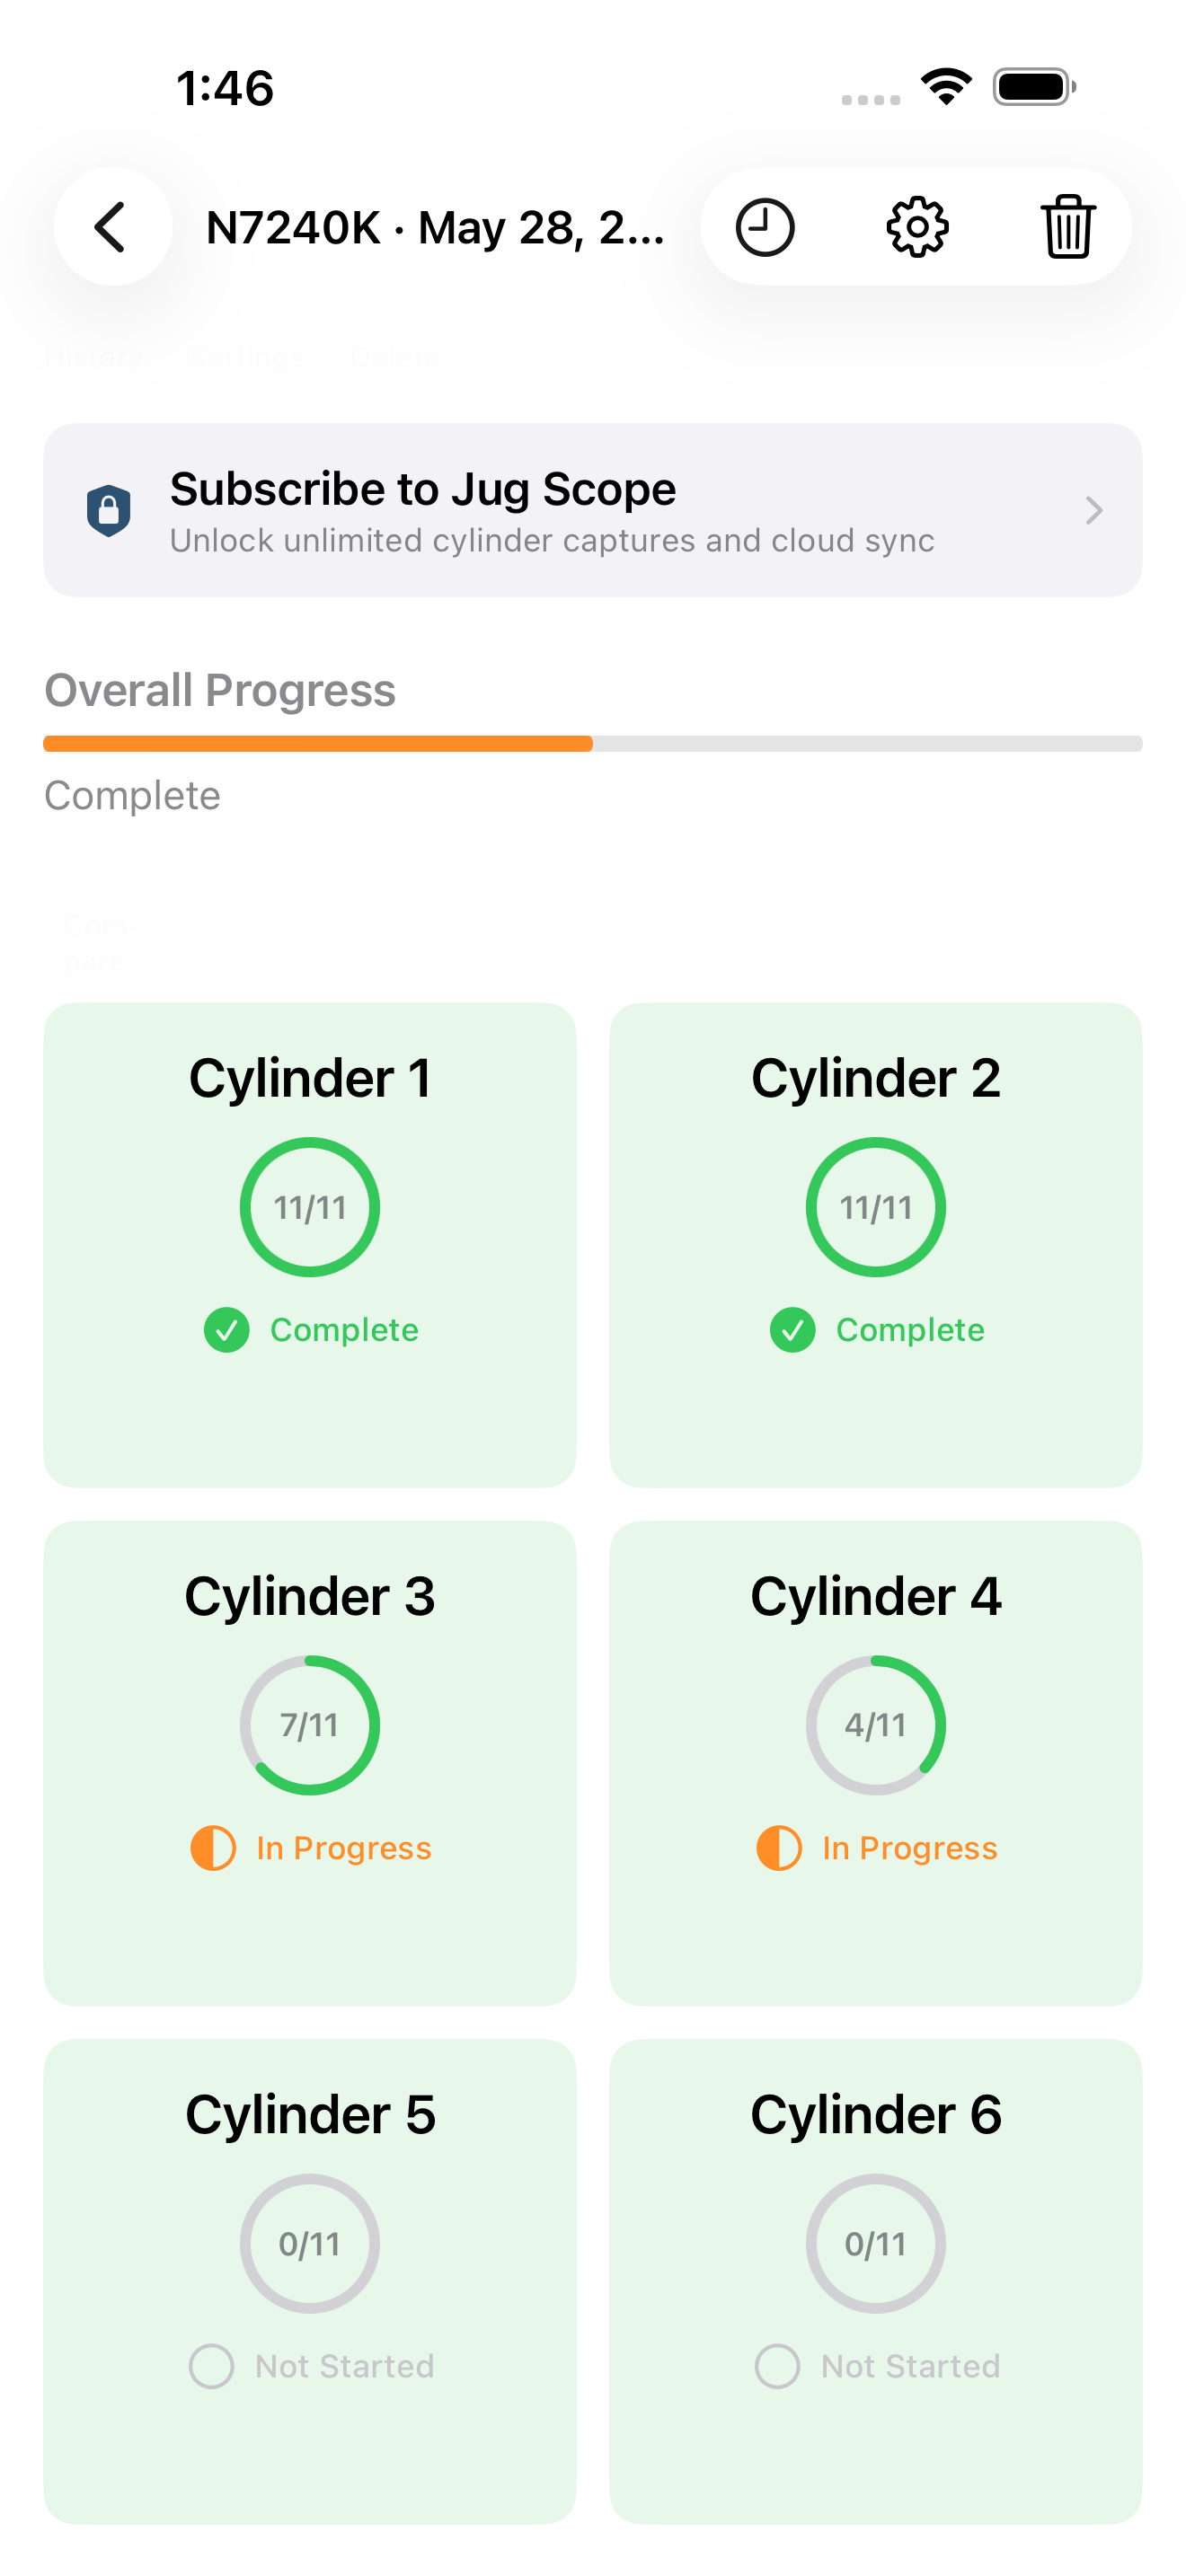
4.2 The cylinder overview — your home base
The cylinder overview is where you always know exactly where you stand. At a glance you can see how much of the engine is done, which cylinder is next, and what is left — so you never lose your place, never double-shoot a cylinder, and never put the cowling back on wondering whether you missed one.
After you start, the cylinder overview opens. You will see:
- An overall progress bar across the top, with a running count — for example, "View 8/66" — so completion is always one glance away.
- A grid of cylinders. Each cylinder shows its number, a progress ring, eleven small dots (one per view), the fraction captured, and a status label. Cylinders are color-coded so you can read the whole engine's progress in a second:
- Gray — not started
- Amber — in progress
- Green with a checkmark — complete
- A Continue button that jumps you straight to the next cylinder that still needs work, so picking up where you left off takes one tap.
Tap any cylinder to open its detail and start (or resume) capturing it. Tap Continue Cylinder N to pick up exactly where the app thinks you left off. The toolbar at the top right holds Review (browse everything captured so far — see §5) and, once you have at least one image, Export.
Tip — You do not have to inspect cylinders in numerical order. Work them in whatever order is easiest to reach in the airframe — the grid keeps track regardless, so convenience never costs you completeness.
4.3 The eleven views, in order
These eleven views are the heart of why the record is worth trusting. Shot the same way on every cylinder, they give an analyst a complete, comparable picture — the piston, the full barrel wall, and both valves seen from the angles that actually reveal trouble. Capture all eleven and nothing important is left to chance.
Jug Scope guides you through the same eleven views on every cylinder, grouped into three stages by crankshaft position. The grouping is deliberate kindness to your back and your prop: finish everything you can shoot from one position before you move the propeller, so you rotate it as little as possible.
What "BDC" means. BDC is bottom dead center — the piston all the way down with both valves closed. Most of the views are shot from this position.
Stage 1 — Bottom Dead Center (views 1–7)
Piston down, both valves closed. The most views come from here, so settle in.
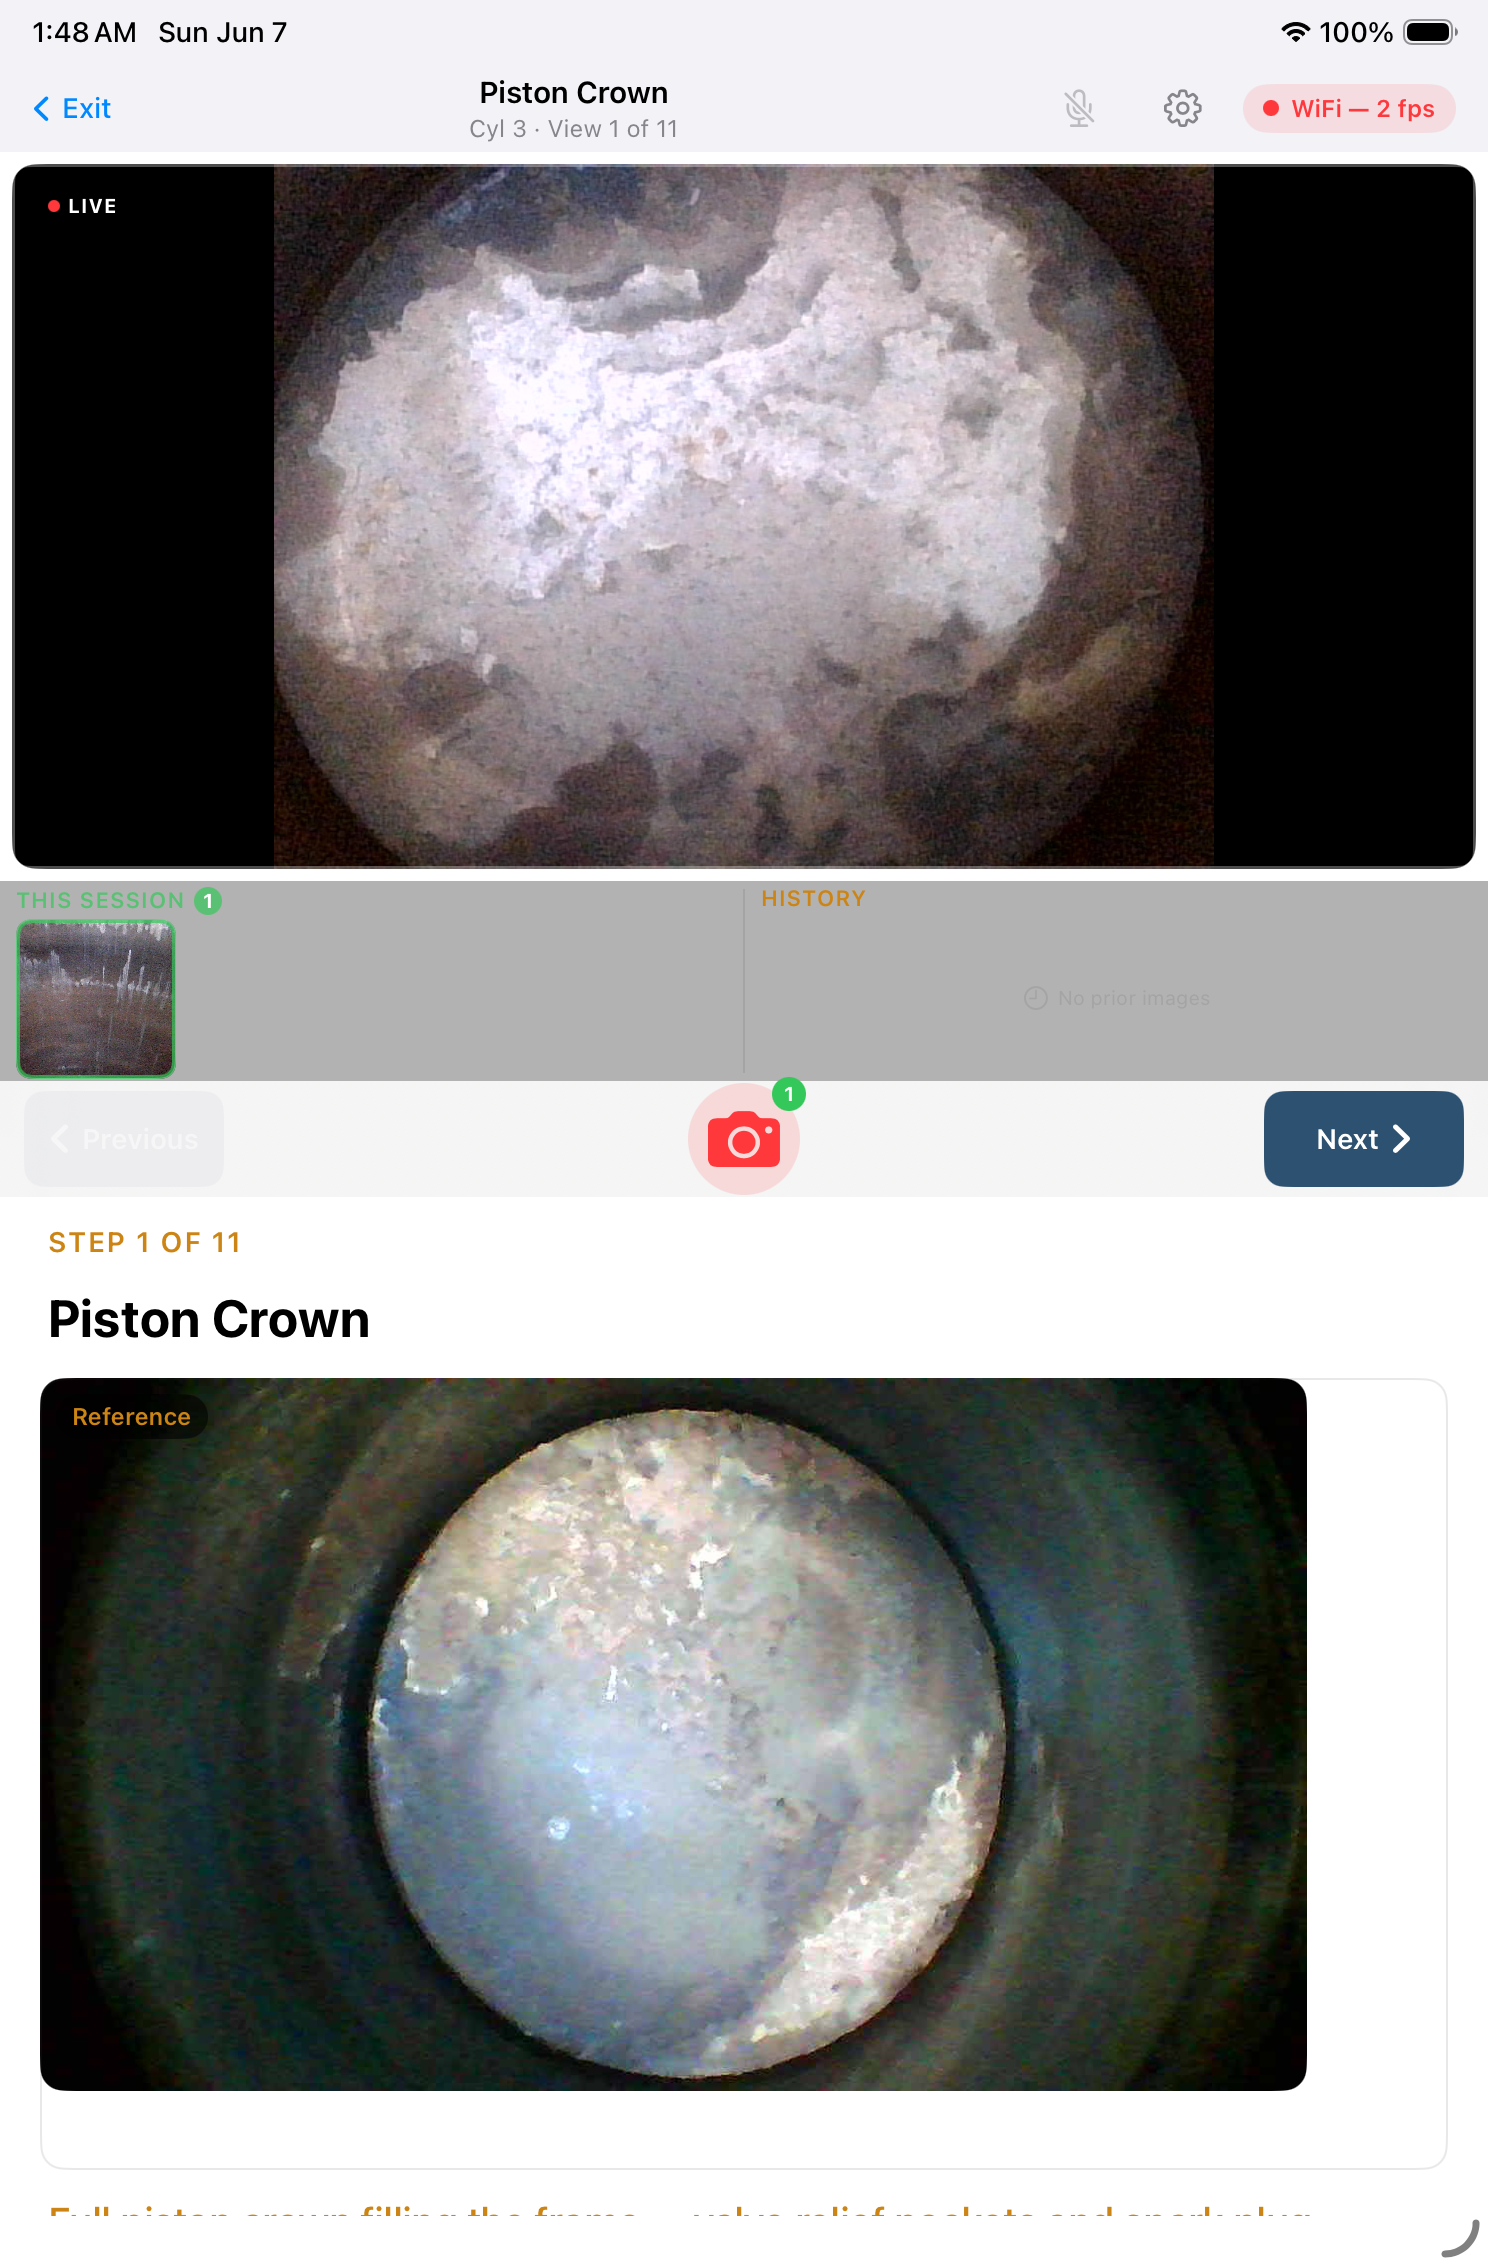
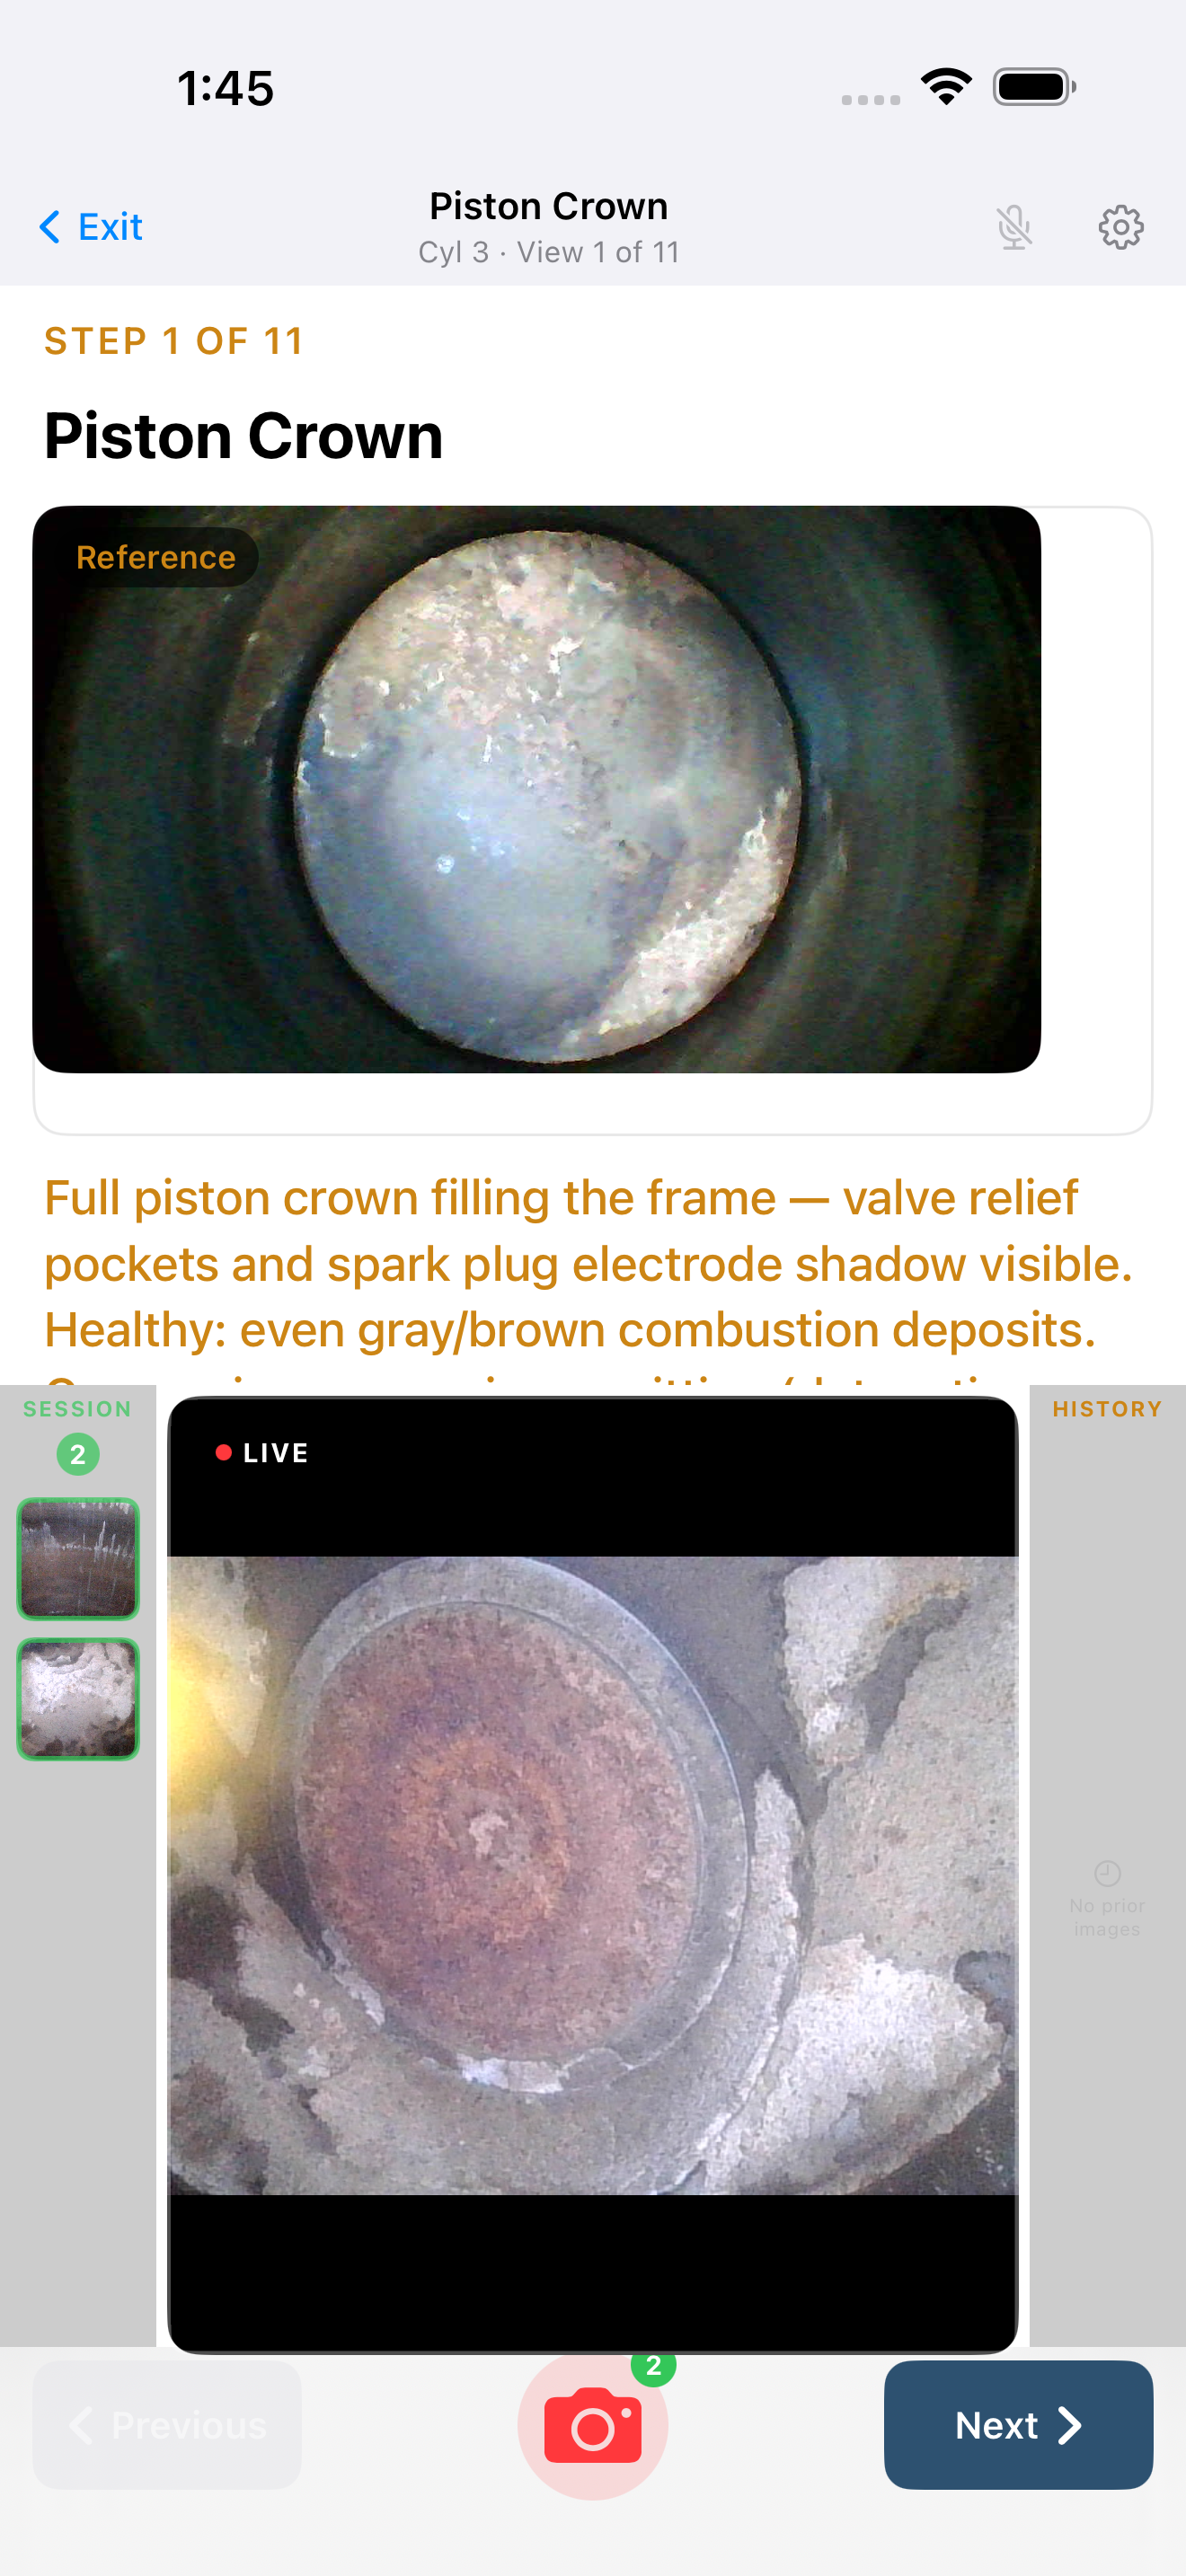
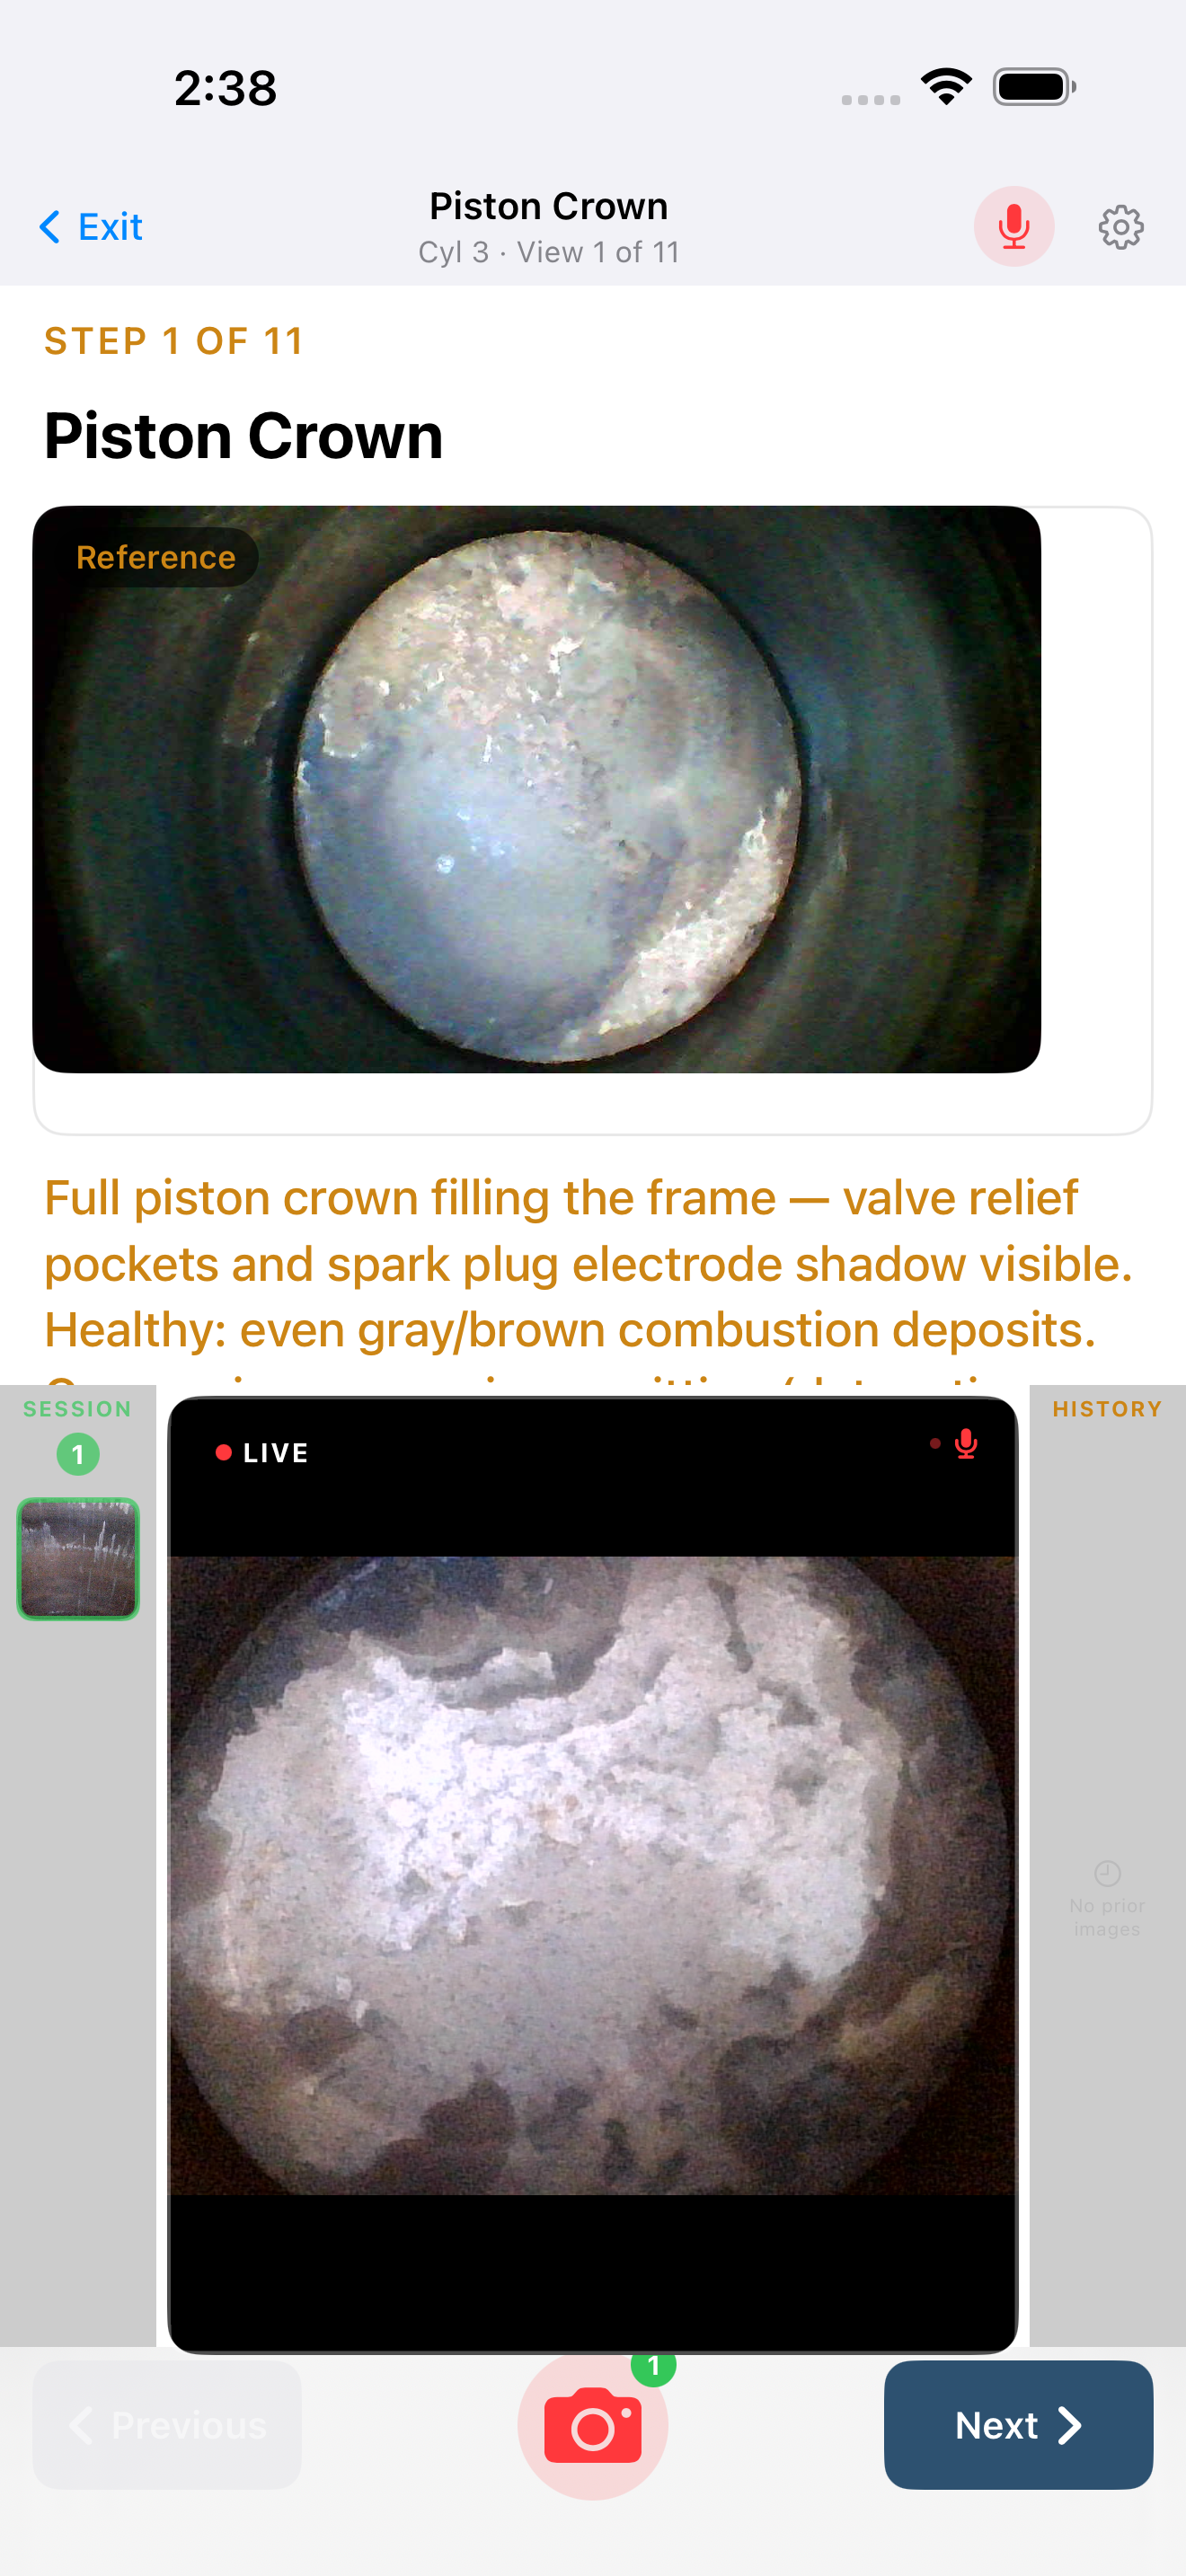
- Piston Crown — straight down at the top of the piston.
- Exhaust Valve Head — the closed exhaust valve face. This is the single most important image in the set; automated screening targets it specifically — getting this one right is the difference between a useful set and a wasted trip.
- Intake Valve Head — the closed intake valve face.
- Cylinder Wall — 12 O'Clock — the barrel wall, top.
- Cylinder Wall — 3 O'Clock — barrel wall, right.
- Cylinder Wall — 6 O'Clock — barrel wall, bottom.
- Cylinder Wall — 9 O'Clock — barrel wall, left. (Completes a full 360° of the barrel — no blind spot where wear could hide.)
Stage 2 — Exhaust Valve Open (views 8–9)
Rotate the propeller until the exhaust valve is fully open, then capture:
- Exhaust Valve Seat + Face — the sealing surfaces where the valve meets its seat. Commonly the weakest image in a submitted set, and one of the most telling — take your time here and you spare yourself a callback.
- Exhaust Valve Stem + Guide — looking up through the open valve toward the stem.
Stage 3 — Intake Valve Open (views 10–11)
Rotate the propeller until the intake valve is fully open, then capture:
- Intake Valve Seat + Face — the intake sealing surfaces.
- Intake Valve Stem + Guide — the intake stem and guide.
Caution — For the valve-open views (8 through 11), the valve really does need to be fully open before you shoot. If you cannot see the seating surface, rotate the prop a little further until the rocker arm reaches the end of its travel. A half-open valve is the single most common reason a set comes back marked inadequate — a few extra degrees of rotation here saves a whole redo.
The on-screen guidance card for each view gives you positioning steps, what a healthy result looks like, and what to watch for. You never have to memorize the list above — the app keeps you in order, which is the whole point.
Note on ordering. The app captures these eleven views in the grouped order shown here (all BDC views first, then exhaust-open, then intake-open) to minimize prop rotation. If you have followed a printed borescope training guide elsewhere, the views are identical; only the on-screen sequence is arranged for efficiency in the hangar.
4.4 Capturing a view
Each capture screen is built to give you a confident shot on the first try. The live picture, an example of what a good result looks like, and the guidance for the current view are all in one place — so you are matching your shot to a known-good reference instead of hoping.
When you enter a cylinder, the capture screen fills the display with the live borescope picture and gives you everything you need for the current view at once:
- The live preview — the real-time feed from your borescope.
- A reference image and guidance — an example of a correct shot of this view, plus the view name and positioning notes. Tap to expand the full step-by-step instructions and the "what to look for" guidance.
- The shutter — a camera button, centered, with a count badge showing how many shots you have already taken for this view.
- Previous / Next — buttons on either side of the shutter to step between views.
- A thumbnail strip of the shots you have captured this session.
To capture:
- Position the borescope per the reference image and on-screen steps.
- Hold steady, then tap the shutter. The screen flashes briefly to confirm the capture. (If your borescope has a control button on the pod, you can fire the shutter from there too — see §3, Hardware Setup.)
- The shot is saved to the current view, and the count on the shutter ticks up.
You can take more than one image per view — capture a few and keep the best. It is far faster to grab two good tries now than to re-rig the probe later.
Tip — Let the picture settle before you tap. The most common cause of a blurry image is moving the probe at the instant of capture — a half-second of patience here is the cheapest quality you will ever buy.
The iPhone and iPad lay this out differently, so both are shown below.

4.5 Moving between views
Moving through the views should feel like following a clear trail, not keeping a checklist. The app advances you in order and always shows where you are, so you stay oriented from the first view to the last without having to track it yourself.
Use Next to advance to the following view and Previous to step back. Jug Scope walks you through all eleven in order; the navigation bar shows your place (for example, "View 4/11"), and the small dots on the cylinder overview fill in as you complete each one.
When you want the full positioning detail and the list of common mistakes right alongside the live picture, open the instructions peek sheet — a longer, scrollable version of the current view's guidance you can read without leaving the preview.
4.6 Reviewing and retaking a shot
The best time to catch a bad image is the moment you take it — while the probe is still in place. Right after each capture, Jug Scope shows you the shot so you can confirm it then and there, instead of discovering a blur or a missed angle after the cowling is back on.
The review shows the shot you just took, a one-line inspection hint for that view, and two choices:
- Accept — keep the image and continue.
- Retake — discard it and return to the live preview to try again.
You can also tap any thumbnail in the strip to revisit an earlier capture and decide whether to keep or retake it.
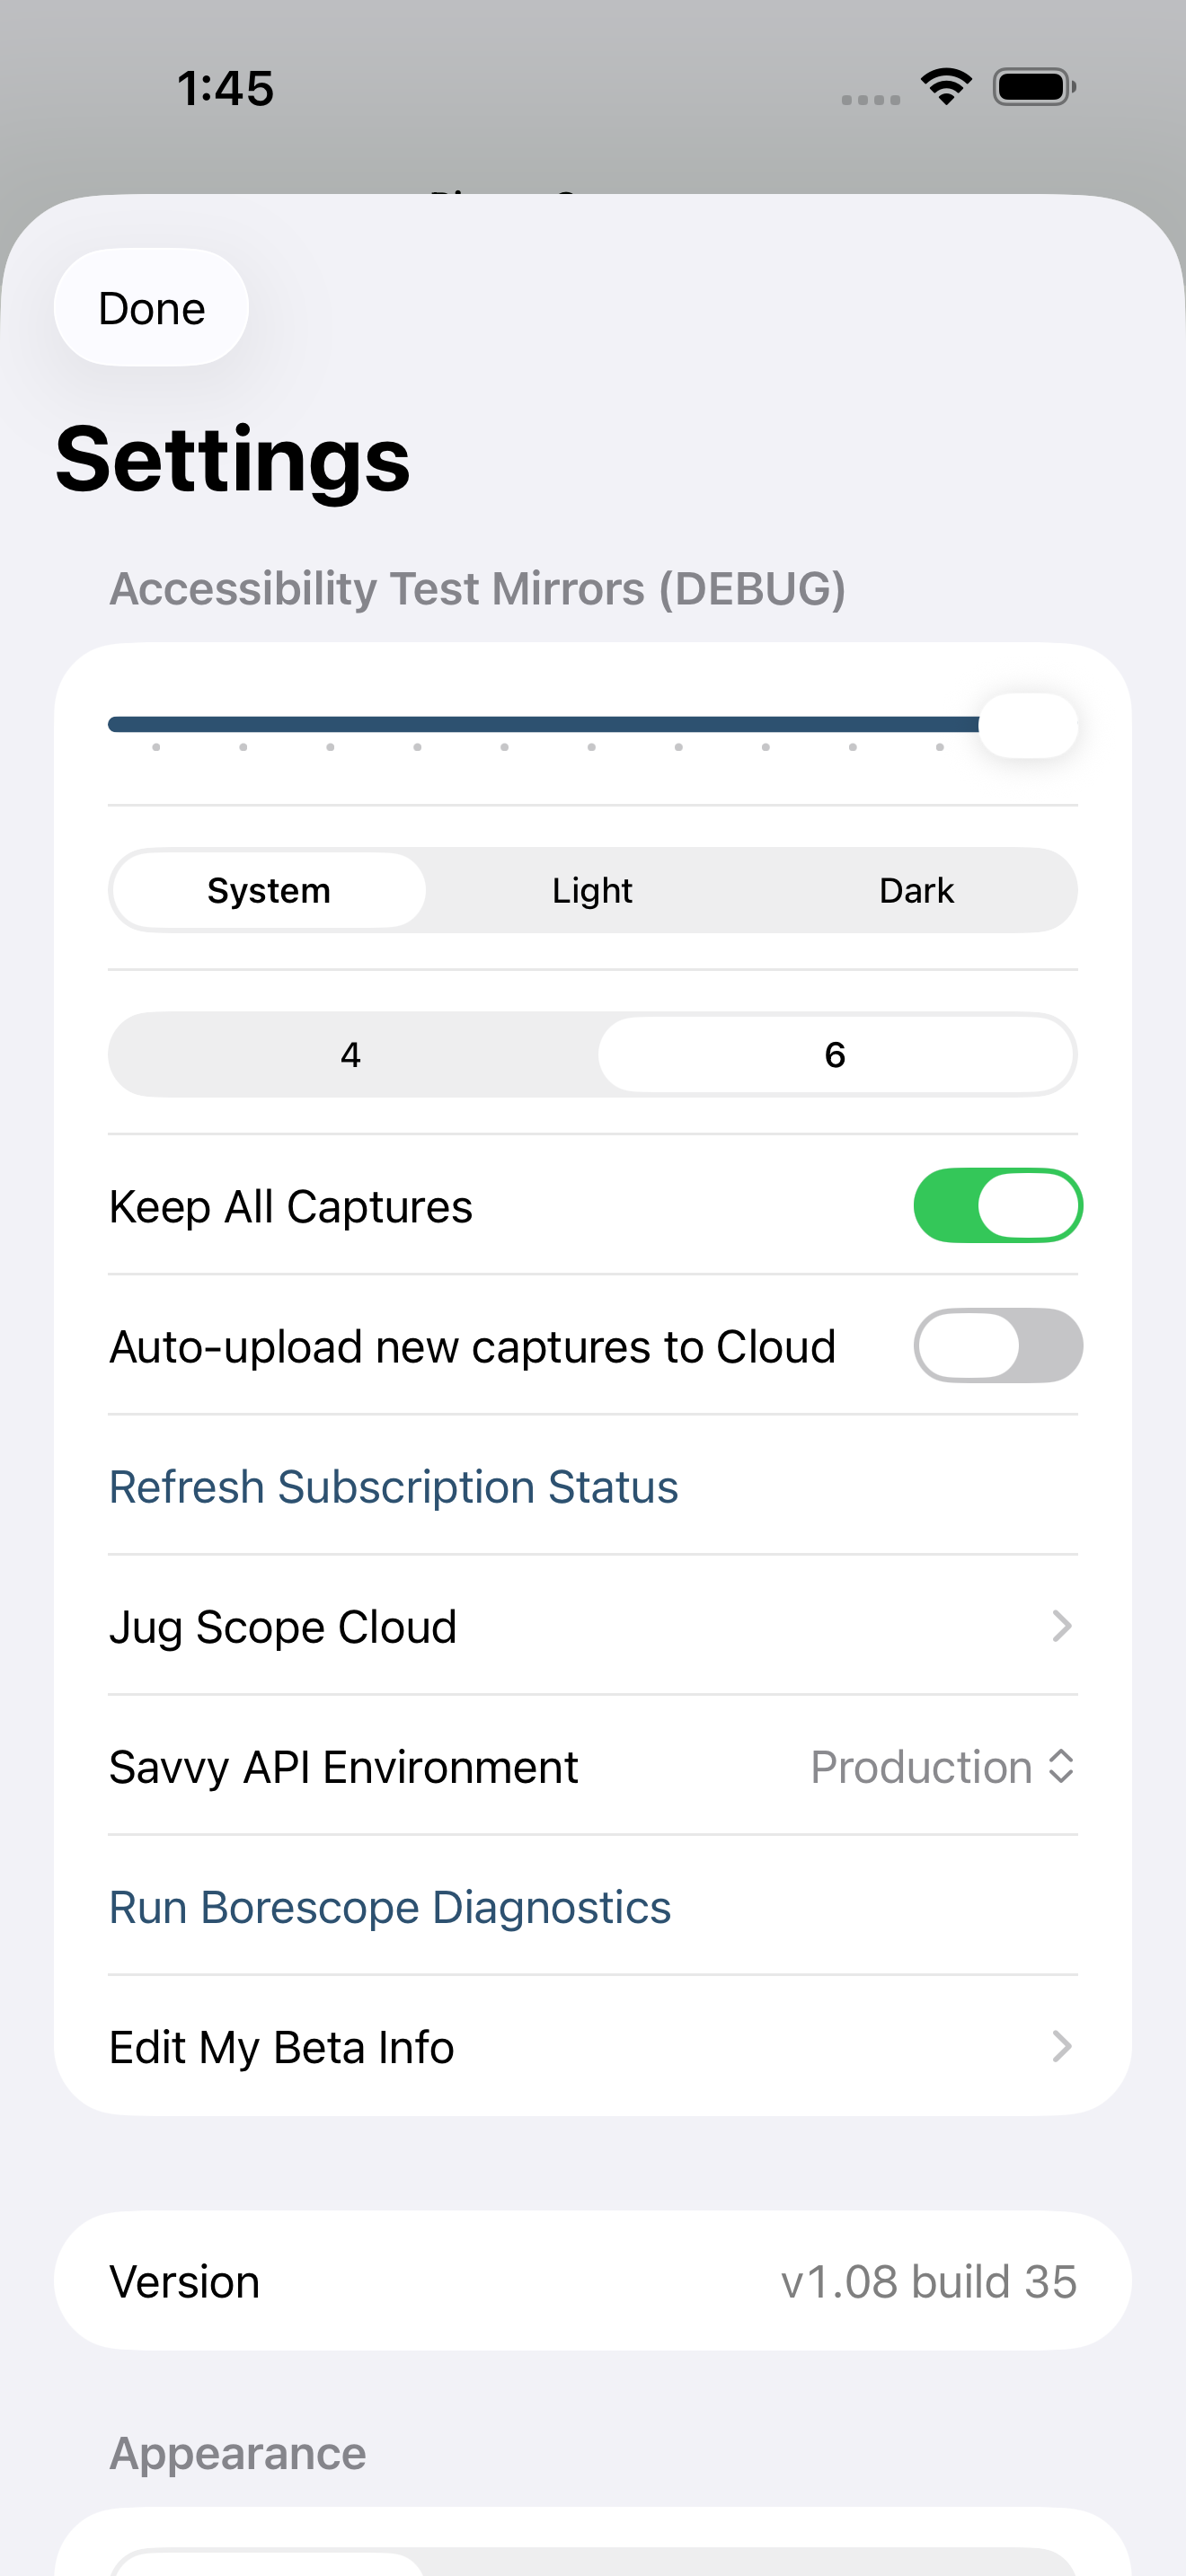
About "Keep All Captures." By default, Jug Scope keeps every image you accept, so you can shoot several tries at a tricky view and pick the winner later in Review. You can change this behavior in Settings → Defaults (see §11).
4.7 Resuming an interrupted cylinder
Hangars are full of interruptions, and Jug Scope is built so none of them cost you a cylinder. Put the iPad down partway through, get pulled away, come back an hour later — the app remembers exactly where you were and offers to pick up right there.
If you return to a partly finished cylinder, a Resume capture? prompt appears over the live preview — so you can eyeball the borescope's position before you decide — with two choices:
- Resume — jump to the first view that still needs a shot (for example, "Resume at view 4 of 11 — Cylinder Wall — 12 O'Clock").
- Start Over — discard the cylinder's captures and begin again. If there are already images to lose, the app asks you to confirm before discarding.
The default is to resume, so a normal interruption costs you nothing.
4.8 Hands-free voice capture
When both hands are on the borescope, reaching for the screen is exactly when you lose your framing. Voice capture lets you fire the shutter without letting go — so you can hold a hard-won probe position and still get the shot. It is the feature you will appreciate most on the awkward angles, which are often the ones that matter.
Turn on the microphone from the capture screen; a "Shoot!" badge on the mic toggle confirms Jug Scope is listening. Position the probe, hold steady, and say "shoot," "snap," or "camera" to fire the shutter.
4.9 Finishing a cylinder, then the inspection
Finishing is where the work pays off: the moment every cylinder turns green, you are holding a complete, organized record of the whole engine — ready to compare against the past or send on for an expert read.
When all eleven views for a cylinder are captured, its grid cell turns green with a checkmark and the dots fill in completely. Return to the cylinder overview (or use the Continue button) and move to the next cylinder. Repeat the eleven-view sequence for each one.
The inspection is complete when every cylinder shows green and the overall progress bar reads full. From here you can:
- Review and compare everything you captured — see §5, Reviewing & Comparing.
- Share or send the inspection to your shop, to a customer, or out for expert analysis — see §6, Sharing & Analysis.
During beta: Reviewing, exporting, and sharing a finished inspection are all open. At launch these steps require a subscription; capturing the images is always free. See §9, Billing & Plans.
4.10 Optional: other components
The eleven-view protocol covers the cylinders — the heart of the inspection — but sometimes the story is somewhere else: a turbocharger, the cut-open oil filter, a part you are watching. Other Components lets you fold that documentation into the same record, so everything about this engine on this day lives in one place instead of scattered across your camera roll.
Open Other Components, choose one of the built-in component types or add a custom one, then capture as many images as you like. These are entirely optional — nothing forces you to add components, and skipping them does not affect cylinder completion.
4.11 Tips for good captures
A handful of habits separate an inadequate image set from one an analyst can actually use — and they are the same habits that keep you from a callback or a second trip up the ladder:
- Light evenly and fill the frame. Get close enough that the subject fills the picture without blowing out the highlights. A clear, well-lit shot is read once; a murky one gets sent back.
- Hold still before you shoot. Let the live preview steady, then capture. Sharpness is free if you wait half a second for it.
- For valve views, open the valve all the way. If you cannot see the seating surface, rotate the prop further. This is the most common reason a set is rejected — and the easiest to prevent.
- Keep your barrel-wall shots consistent. Similar distance and framing at 12, 3, 6, and 9 o'clock make wear easy to compare side by side, this inspection and the next.
- Know your sides. The exhaust valve is on the same side as the exhaust port and usually shows more heat color; the intake is opposite. If a valve you think is the intake looks heavily distressed, double-check which side you are on before you draw a conclusion.
- Capture a couple, keep the best. Two good tries now beats re-rigging the probe later, every time.
For per-view detail — exact probe positioning, what healthy versus concerning looks like, and the common mistakes for each of the eleven views — the in-app guidance card and the Glossary have you covered.