The 11-View Borescope Inspection Protocol
A step-by-step guide to capturing a complete cylinder borescope inspection. Based on Savvy Aviation's standardized protocol.
What You Need
- iPad with USB-C or iPhone (iOS/iPadOS 17+)
- WiFi or USB-C borescope (8.5mm+ diameter recommended)
- Access to top spark plug hole on each cylinder
- Ability to rotate the propeller by hand
- Jug Scope app installed
Eleven standardized views tell the complete story of every cylinder.
3 Groups, 11 Views
For each cylinder, capture all 11 views in order. The views are grouped by crankshaft position to minimize prop rotation.
Both valves closed. Piston, valve heads, cylinder walls.
Seat and stem inspection while valve is lifted.
Seat and stem inspection on intake side.
Bottom Dead Center — Views 1–7
Position the piston at bottom dead center. Both valves are closed. Capture all 7 views before rotating the prop.
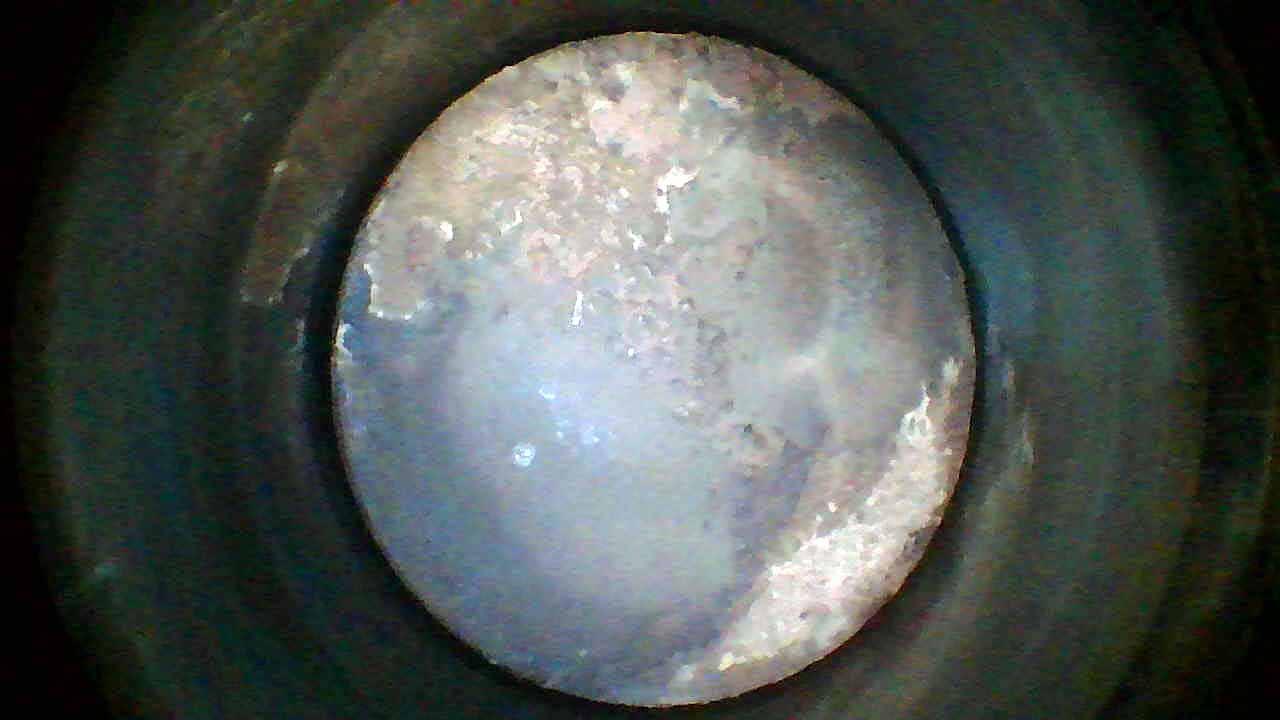 Piston Crown
Piston Crown
Aim straight down at the piston crown. Look for unusual carbon patterns, erosion, or damage. Normal pistons show even carbon deposits. Hot spots or clean patches may indicate detonation.
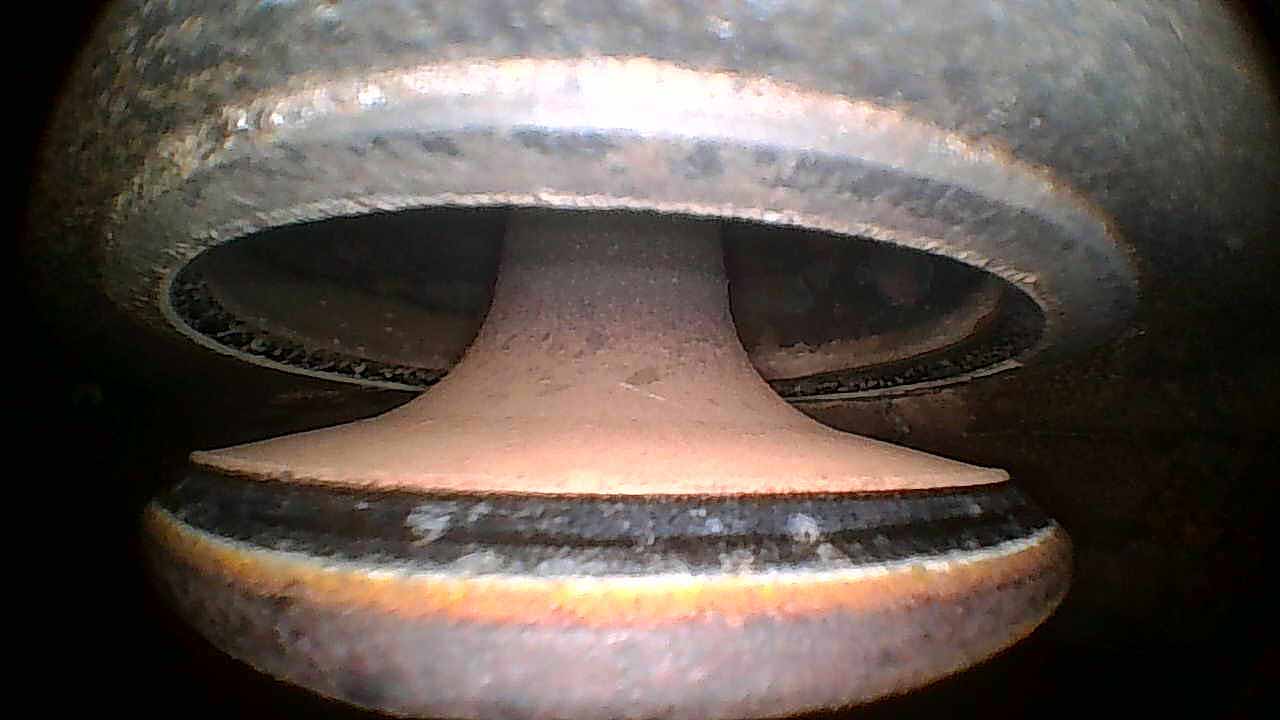
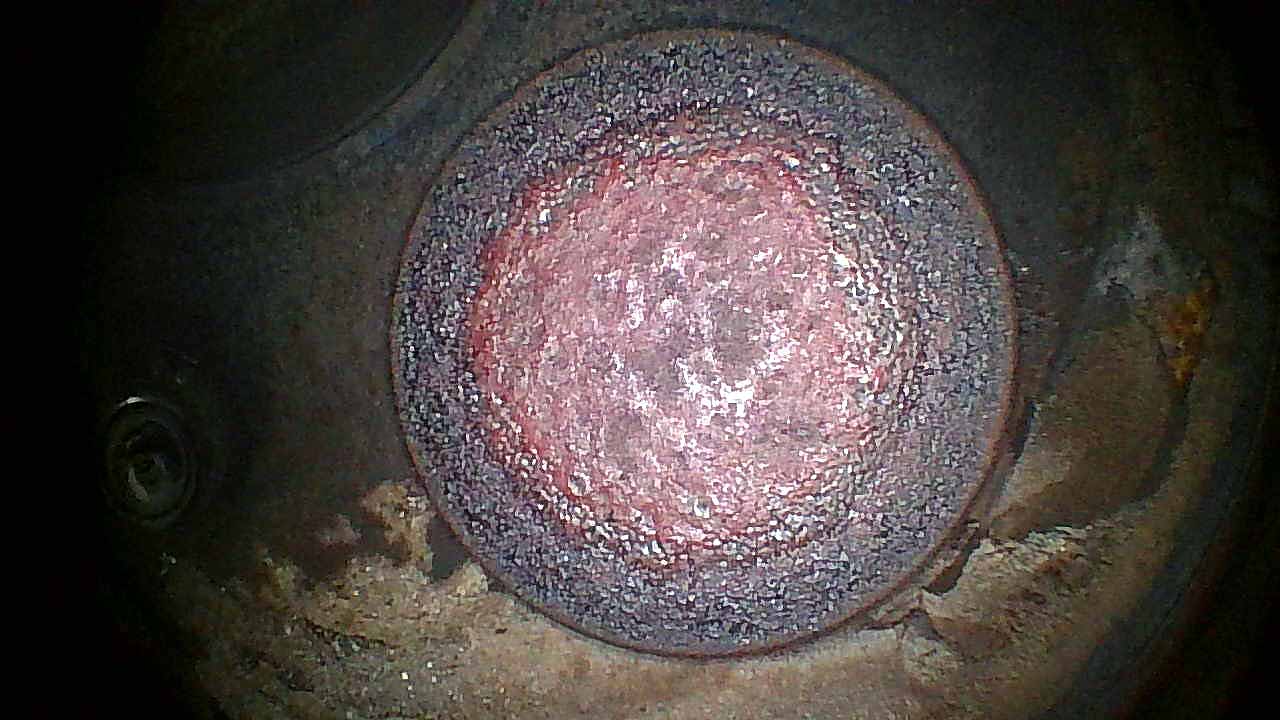 Exhaust Valve Head
Exhaust Valve Head
Aim directly at the exhaust valve face. Center the valve in the frame. Look for erosion, pitting, or hot spots. The exhaust valve runs hottest and shows wear first.
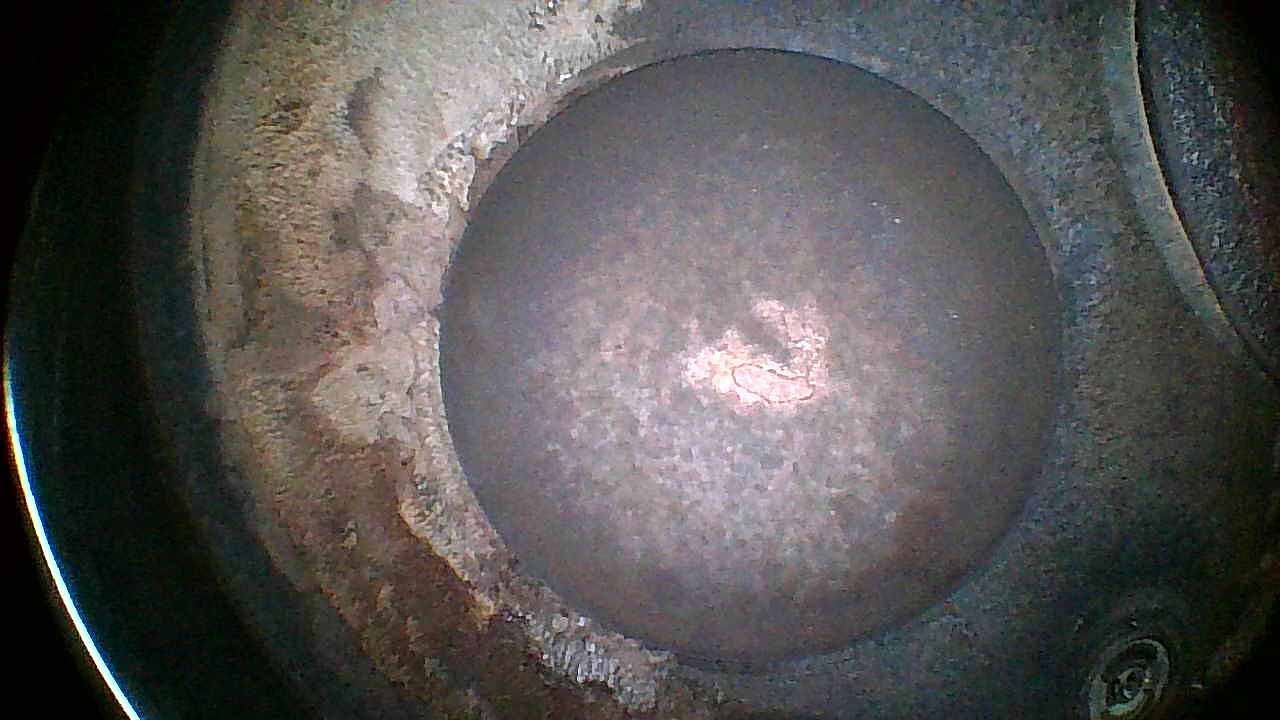 Intake Valve Head
Intake Valve Head
Aim at the intake valve face. The intake valve typically shows less wear than exhaust but inspect for corrosion, deposits, or damage from foreign objects.
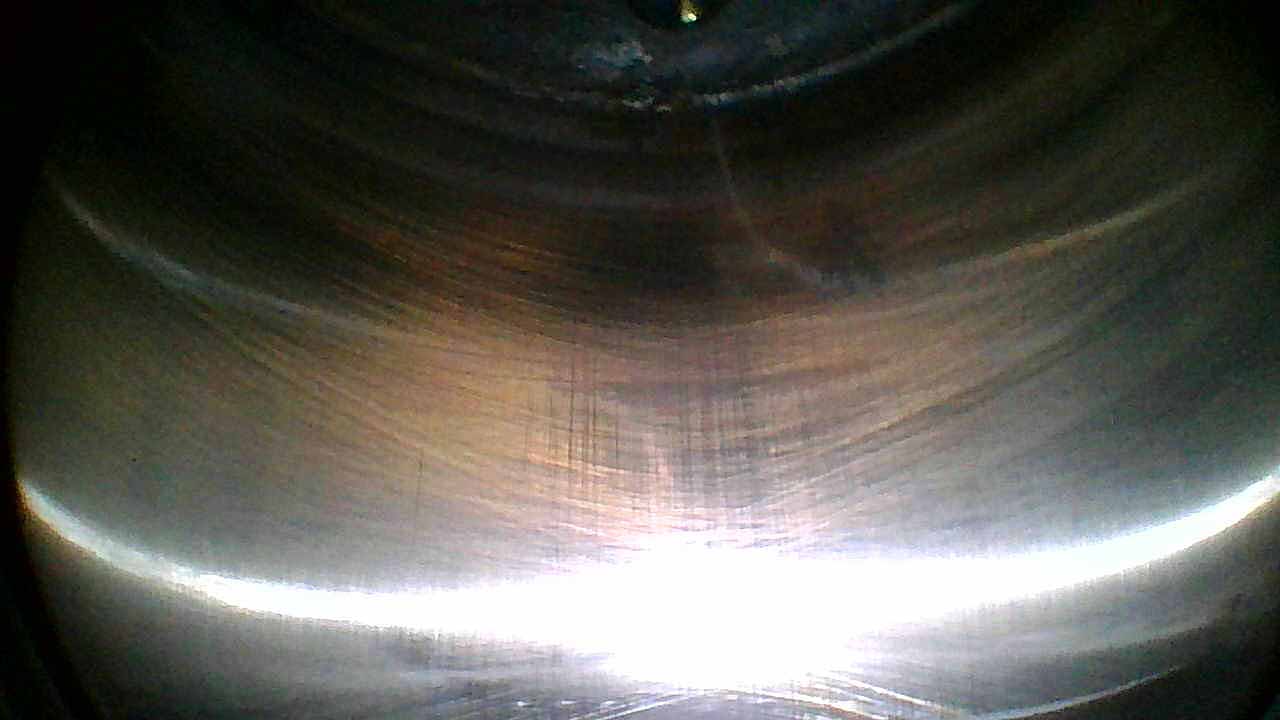 Cylinder Wall — 12 o’clock
Cylinder Wall — 12 o’clock
Point the borescope at the 12 o’clock position on the cylinder wall (top). Look for scoring, corrosion, or unusual wear patterns. Healthy walls show visible crosshatch honing marks.
 Cylinder Wall — 3 o’clock
Cylinder Wall — 3 o’clock
Rotate the borescope 90° clockwise to view the 3 o’clock position. Check for scoring or rust that could indicate ring problems or moisture ingress.
 Cylinder Wall — 6 o’clock
Cylinder Wall — 6 o’clock
Continue to the 6 o’clock position (bottom of the barrel). This area can accumulate oil and deposits. Look for abnormal carbon buildup or wall irregularities.
 Cylinder Wall — 9 o’clock
Cylinder Wall — 9 o’clock
Complete the wall survey at the 9 o’clock position. Compare all four wall views for symmetry — uneven wear patterns can indicate piston ring or cylinder geometry issues.
Rotate the prop to open the exhaust valve. You will see the valve lift off the seat.
Exhaust Valve Open — Views 8–9
Rotate the prop to open the exhaust valve fully. You will see the valve lift off the seat.
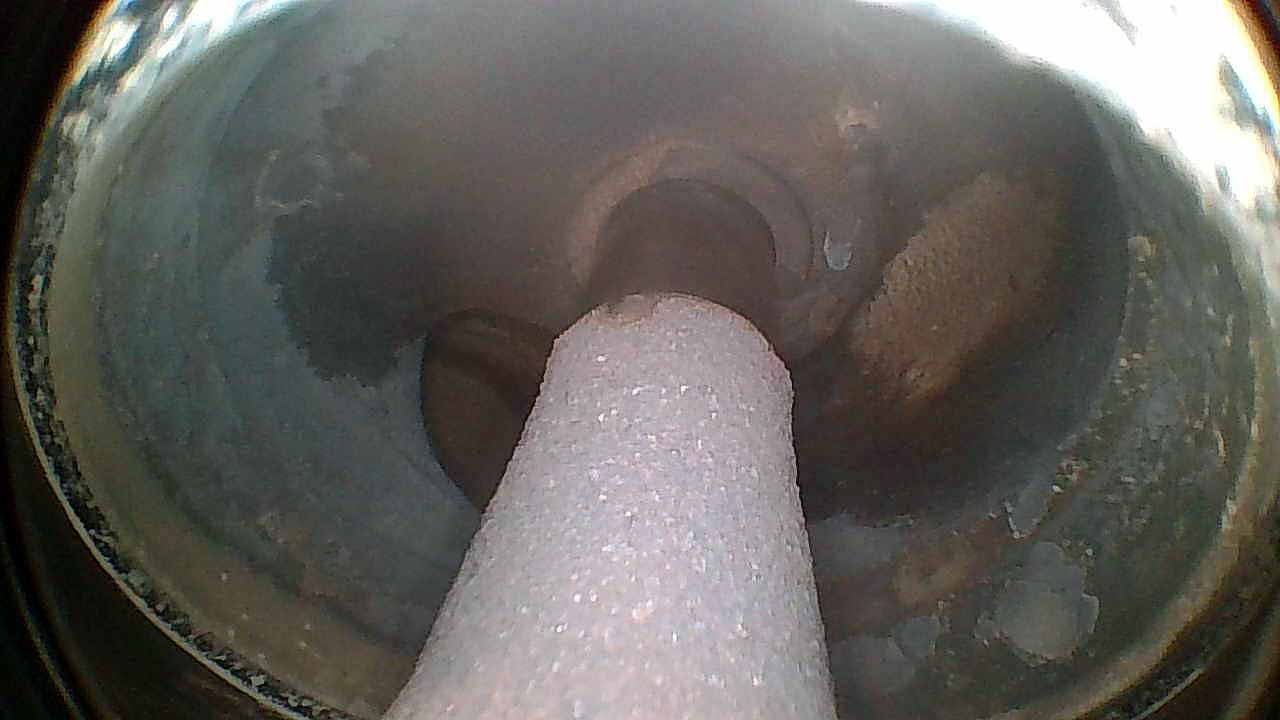
 Exhaust Valve Seat
Exhaust Valve Seat
With the exhaust valve open, view the valve seat surface. Look for pitting, erosion, or uneven contact patterns. A good seat shows a uniform contact band around the full circumference.
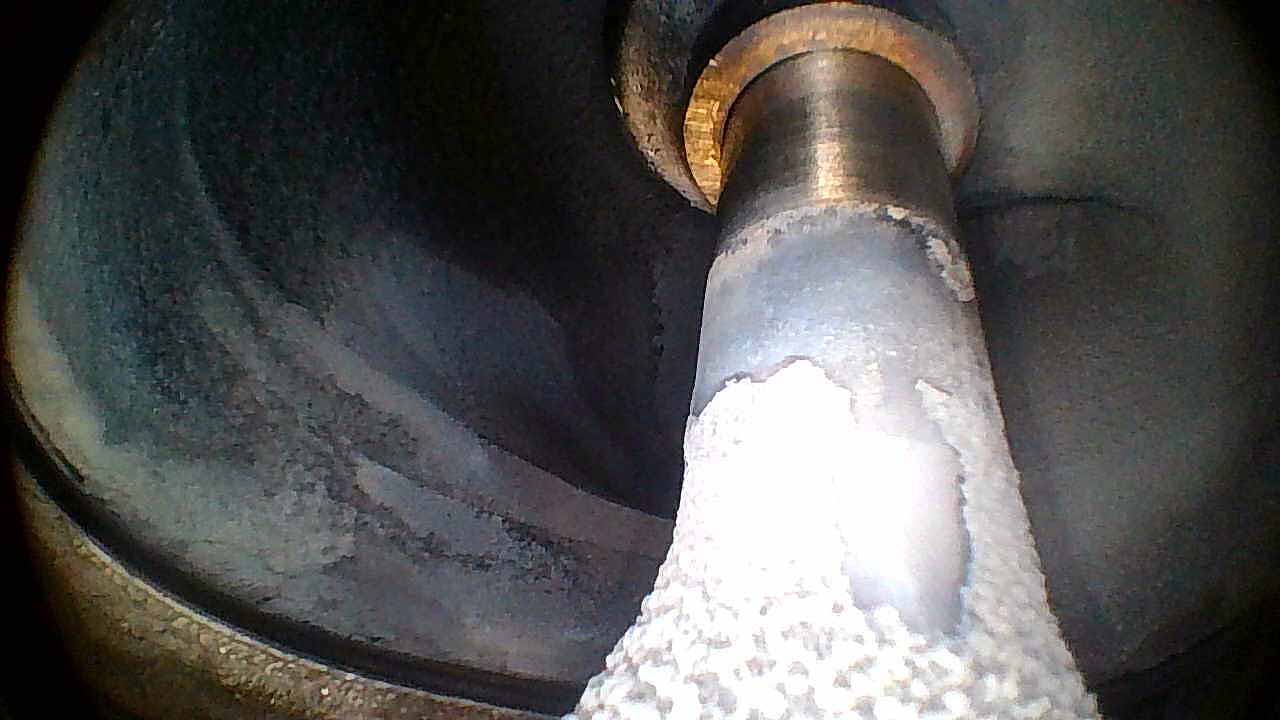
 Exhaust Valve Stem
Exhaust Valve Stem
View the exhaust valve stem and guide area. Look for carbon buildup on the stem, guide wear, or evidence of oil passage past the guide.
Intake Valve Open — Views 10–11
Rotate the prop to open the intake valve fully.
 Intake Valve Seat
Intake Valve Seat
With the intake valve open, view the seat surface. Compare condition to the exhaust seat. Intake seats typically show less thermal stress but may have deposits from induction system contaminants.
 Intake Valve Stem
Intake Valve Stem
View the intake valve stem and guide. The intake side typically shows less carbon than exhaust. Look for guide wear or unusual deposits.
Repeat this 11-view sequence for each cylinder. A complete 6-cylinder inspection produces 66 images. A 4-cylinder inspection produces 44 images.
Tips for Good Captures
Hold still for 1-2 seconds before tapping Capture. Motion blur is the most common quality issue.
Clean the lens with a microfiber cloth between cylinders for consistent image clarity.
Adjust LED brightness for even illumination. Too bright washes out detail; too dim introduces noise.
Stay within 3 feet of the iPad when using WiFi for the best signal quality.
Capture extra views if something looks unusual. More data helps Savvy's analysts make better assessments.
Work in shade or a hangar if possible. Direct sunlight makes the iPad screen harder to read.
Insert slowly and avoid scraping the spark plug threads. Gentle, steady movements produce the best images.
Works with the borescopes already in your toolbox.
Supported Borescopes
Jug Scope works with WiFi and USB-C borescopes from major manufacturers.
| Borescope | Connection | Status | Notes |
|---|---|---|---|
| Vividia W03 / AirBox | WiFi | Recommended | Good image quality, reliable WiFi |
| Depstech WF028 | WiFi | Supported | Compatible but lacks articulation — not recommended for aviation |
| Teslong TD500 | WiFi | Supported | Excellent color reproduction |
| Any USB-C UVC camera | USB-C | Automatic | Plug and play, iPad only |
iPhone supports WiFi borescopes only. USB-C borescopes require iPad (iPadOS 17+).
Don't see your borescope? The app supports custom WiFi configuration. Contact us if you need help.
Getting Started
New to Jug Scope? Here's how to go from download to your first complete inspection.
Join the beta — Jug Scope is currently in beta on iPad and iPhone. Apply for access.
Sign in with Apple — the app creates your account automatically.
Enter your aircraft info — tail number, engine type, and number of cylinders.
Connect your borescope — plug in USB-C or join the borescope's WiFi network.
Follow the guided capture workflow — the app tells you every step, every cylinder, every view.
Review your images — pinch-to-zoom, retake any view if needed.
Upload to Savvy or export a ZIP — all images correctly named and ready for analysis.
Ready to try it?
Jug Scope is currently in beta. Apply for access and start your first inspection.
Join the Beta